- Sun 01 September 2019
- prototyping
I like my bike and want to protect it from evil thieves. For that, I use an old solid lock that comes with the downside of being quite bulky to carry while riding my bike.
Of course, there are solutions to this such as putting it in a backpack or holding it in my hand while riding. But … where is the fun with these? In particular, when there is my 3D printer waiting eagerly for jobs. The following figure shows the frame of my bike from the side. Clearly, there is space for some 3D printed mounting solution :-).

Side view of my bike’s frame. The red arrow indicates available space for a 3D printed mounting solution for my bike lock.
With the idea in mind to 3D print my prospective bike lock mount, this task becomes a well-defined engineering question. Hence, I model it digitally as a first step.
Modeling the problem
My bike’s frame is modeled in CAD with Autodesk Fusion 360. Subsequently, the same is performed for my old lock.
First, I import the above figure into ImageJ to determine the angle between the two major rods accurately. This is shown in the following figure. Second, the bike lock is measured and drawn in 3D as well.

Measuring the geometry of my bike’s frame.
After modeling the physical system, the fun of designing the bike lock mount itself begins. Keeping in mind that this design will be 3D printed, I chose a three-part approach: two identical parts are used as attachments to the frame and the third part mounts the lock. Without further explaining the design with bare words, please check out the video below to see how it works in an animation. The white pieces are 3D printed and metal screws (not shown) are used to hold all pieces together.
Additionally, the following figure shows a rendering of the whole setup while being mounted to the bike frame.

Rendering of the designed 3D model.
This design is printed on my 3D printer in white PLA. It took around 2x 7h plus 1x 9h, accumulating to 23h of print time. This long print time arises from the somewhat rigid design and the very slow print speed that I used. Prior to the design shown in the video above, there existed a previous design that I did not use due to a failed test print which revealed that it was too bulky. After the 3D printer finished with my final design, it was carefully sanded and tested for proper fitting. The following shows the parts layed out on a table.

All parts that are necessary for the assembly. The white parts were 3D printed and the remaining items are the metal screws and washers.
Finally, the following two images present a test assembly of the design and verify that not only the designed parts fit together but also that the lock fits inside. With this, the assembly is ready to be mounted to the bike.

Half assembled bike lock mount with inserted metal screws.

Finished test assembly. The lock does fit inside the design.
Mounting the 3D print
After cleaning the relevant parts of the bike, the bike lock mount is installed. First, a rubber band is wrapped around the bike shaft to improve adhesion of the mount to the bike in azimuthal direction. This can be seen in the following figure.

Rubber band wrapped around the bike shaft to increase adhesion of the 3D print.
Second, the two identical parts are screwed around the shaft in order to, finally, screw the last 3D printed piece to the two identical parts. The following two figures show these steps in detail.

The two identical 3D printed pieces are mounted to the frame.

Subsequently, the last piece is mounted to the pieces installed beforehand and the bike lock is inserted.
With this, the build is finished and my bike lock mount is safetly mounted to the bike. Finally, no more dangling around of the lock!
Conclusion
Here, I model a part of my bike in CAD and 3D print a plastics mounting assembly for my bike lock. The assembly has been in use for one week now and everything continues to work great!
A few lessons have been learned along the way:
- CAD modeling for such pieces is incredibly useful. One can avoid improper prototypes by creating good models, e.g. ensuring that all moving parts will behave as desired.
- Model as much as possible. I forgot to model a minute section of the bike lock which later required heavy manual post processing.
- There is no engineering without ideas on how to improve the part. I do not plan to 3D print another version of this design but in case I had to, the following two improvements would be integrated: (1) A hole inside the housing of the bike lock mount body in order to drain water and (2) a design that is a little bit less massive. The latter comes from the fact that I tend to design my functional 3D prints too massive in their first iteration because I underestimate the strength of 3D printed PLA.
Don’t hesitate to contact me via email if you have any questions that remain, I would be very happy to assist you in a similar process or give extra information about my own experiences. I don’t provide the model files of the 3D print here because they are very specific to my particular bike and therefore probably useless for anybody else. Nevertheless, drop me an email if you would like to get the STL files of my model.
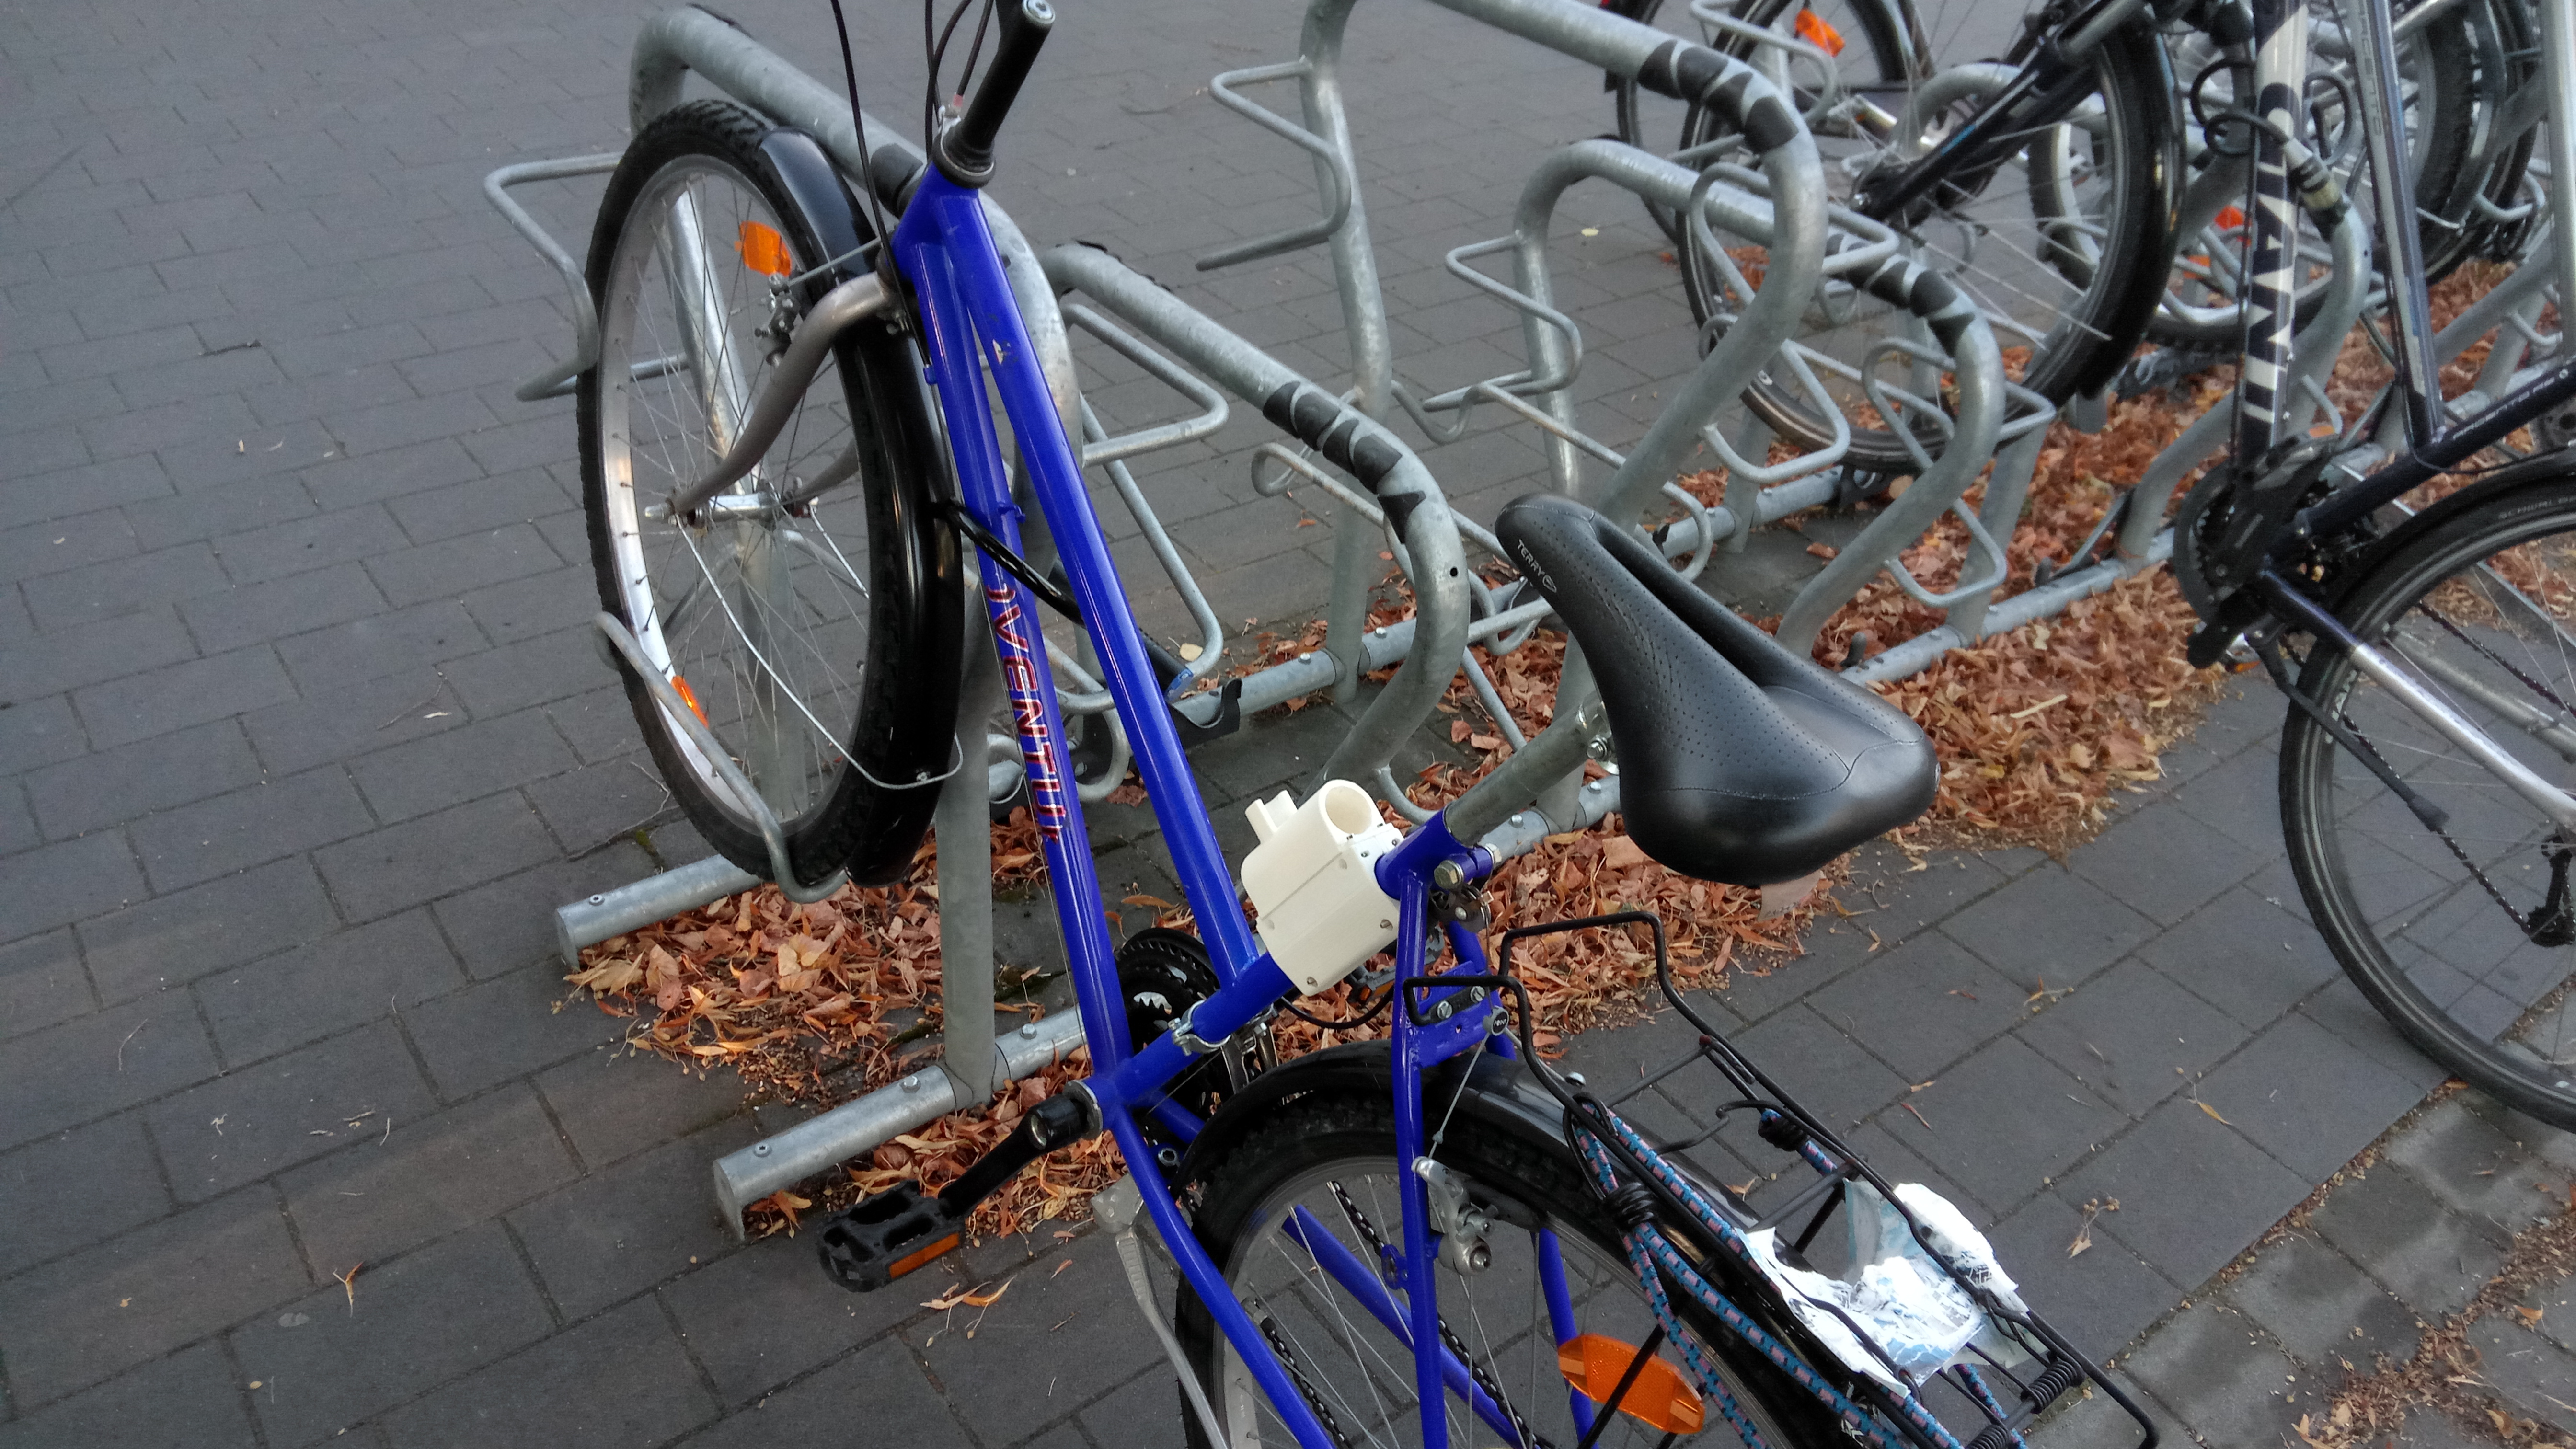
Last but not least, the obligatory evidence of the bike lock mount in wildlife - as found at places that might be familiar to people from Marburg.

The first evidence.
The second evidence.