- Sun 03 November 2019
- prototyping
This article describes how I built an internet-capable lamp. The housing and mechanical parts were made with wood working tools, a 3D printer and a laser cutter. The electrical control unit is realised with a Sonoff Basic IoT module that can be controlled through an app.
The result
The final lamp is shown below.

The result of the project.
The build process in pictures
In the following, you can find pictures that document the build process in a top-down approach: the finished product is shown at first and the steps backward in time to arrive at the final product are documented subsequently. The last picture shows the final lamp again.
Since pictures say more than words, here we go with the pictures:

The final lamp while it is screwed together.

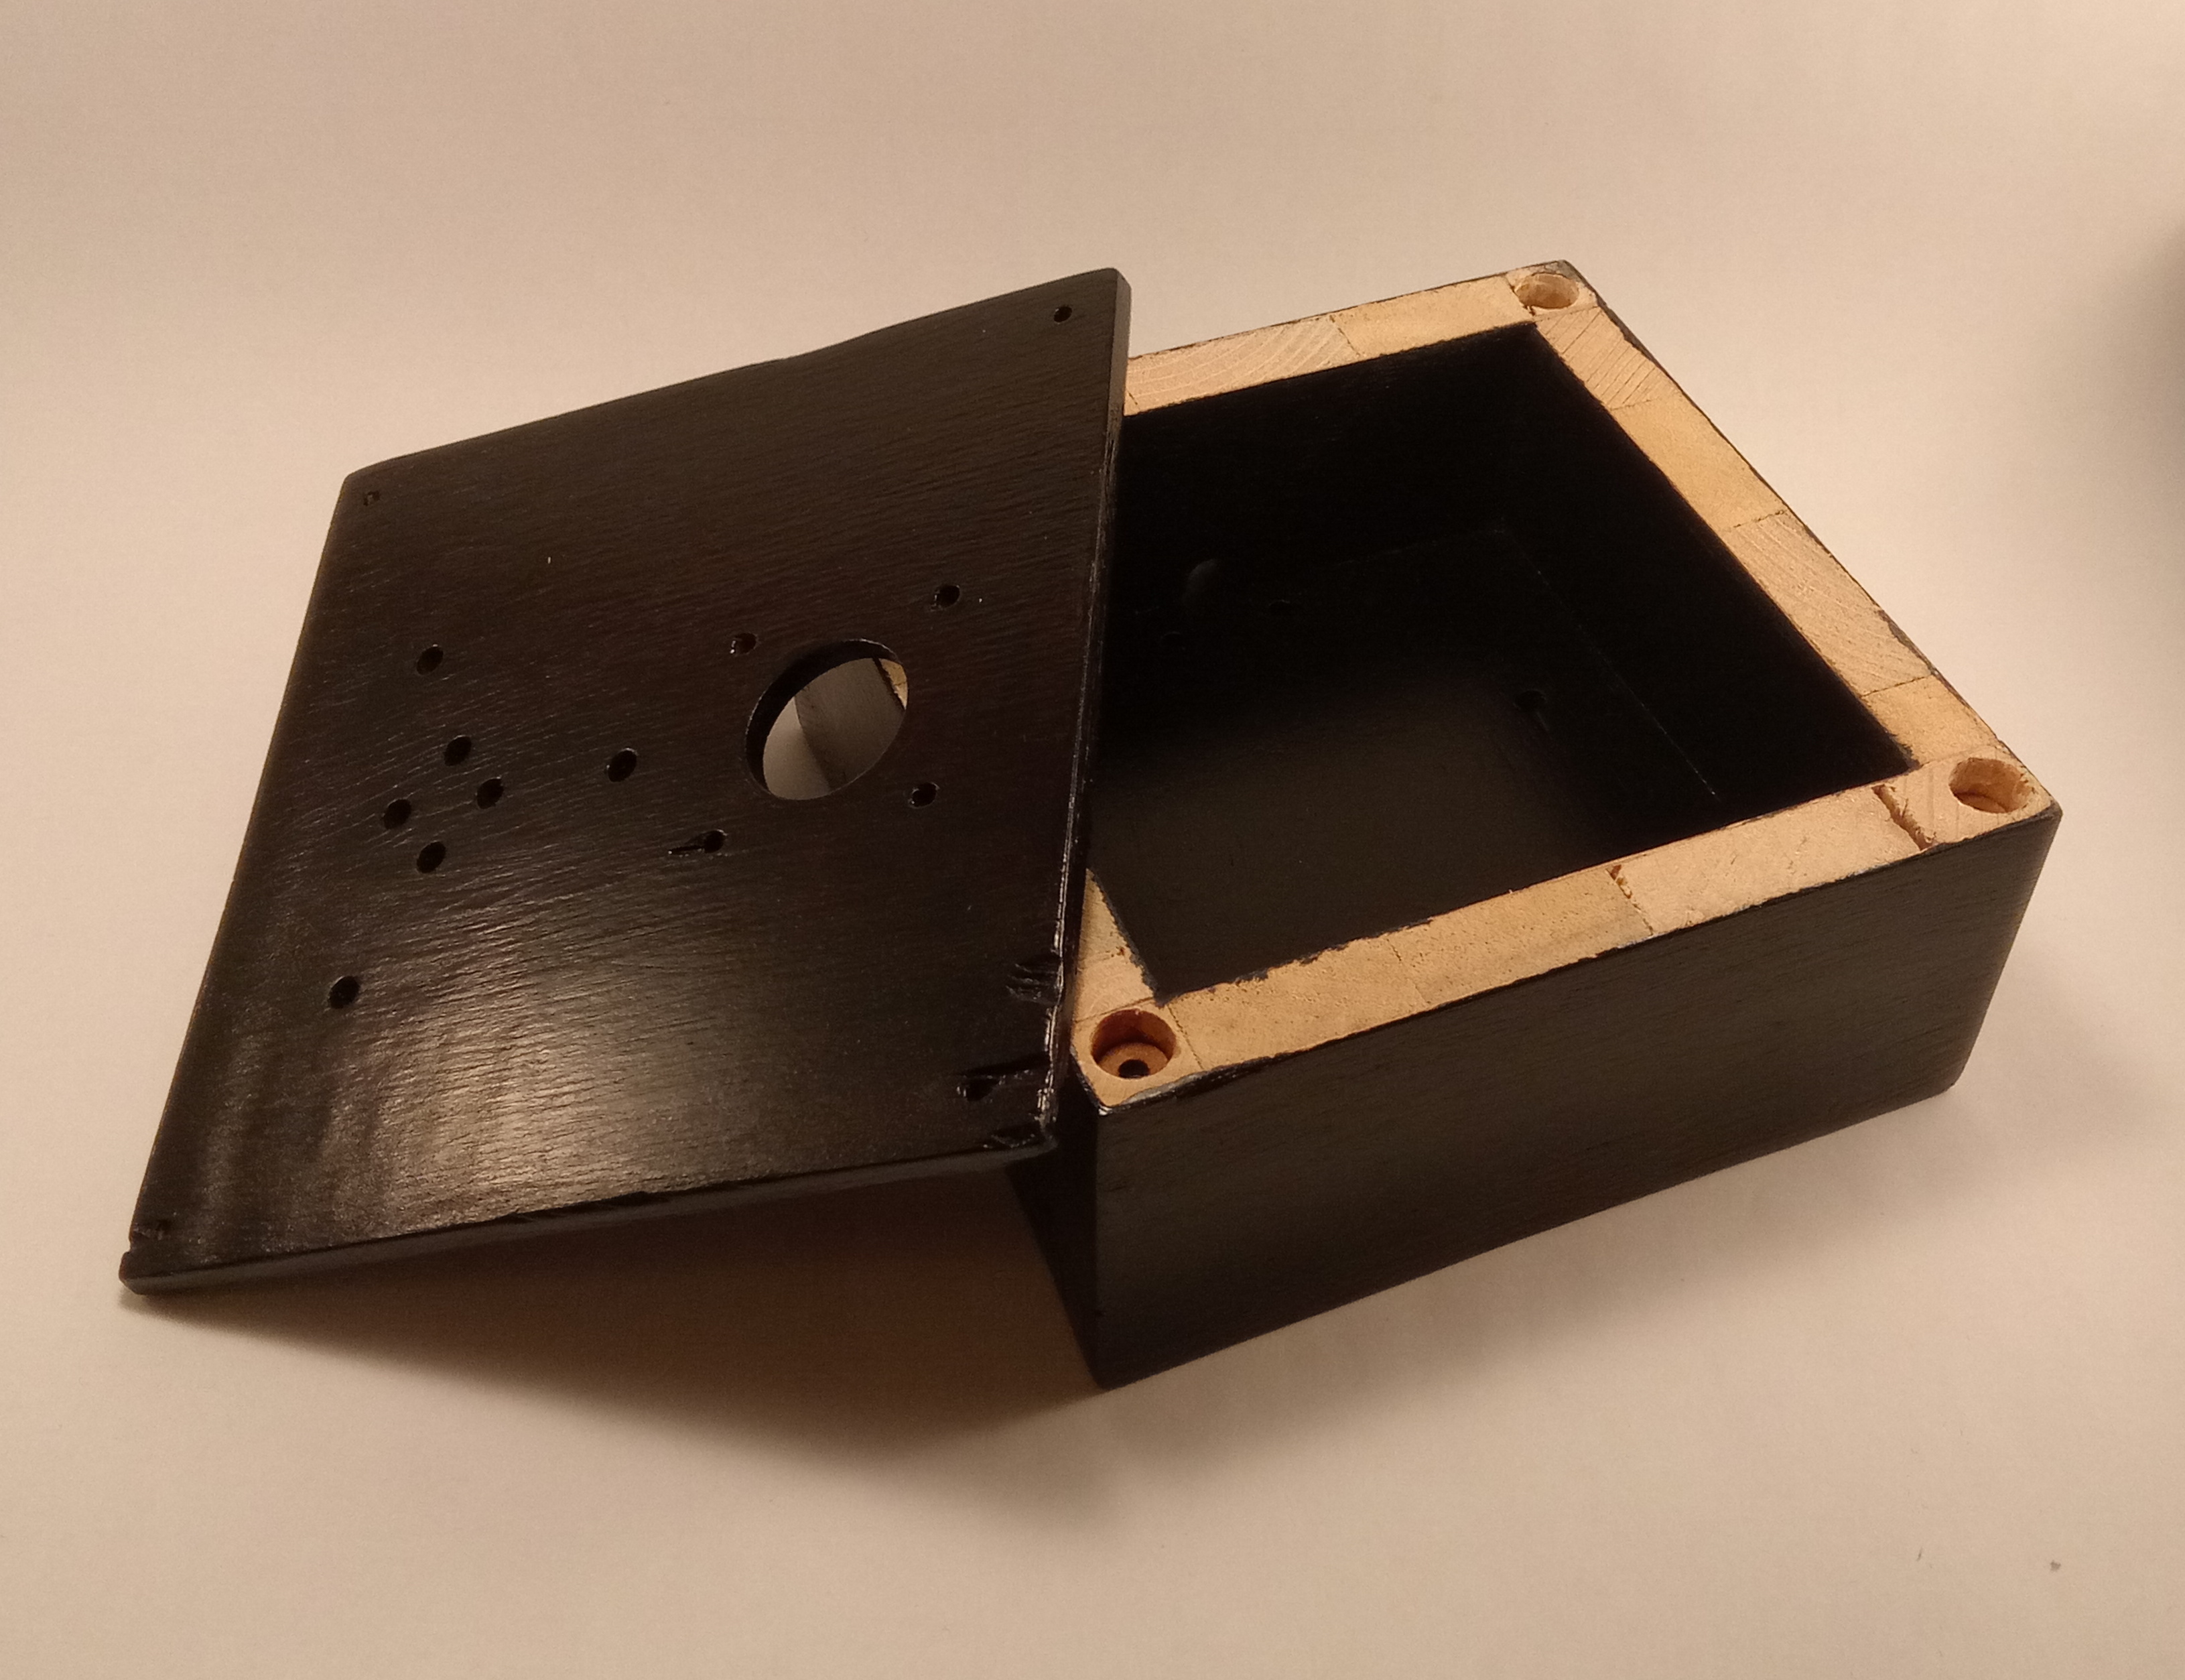
Side view of the final lamp with the lid slightly displaced to show how the lid attaches to the bottom.
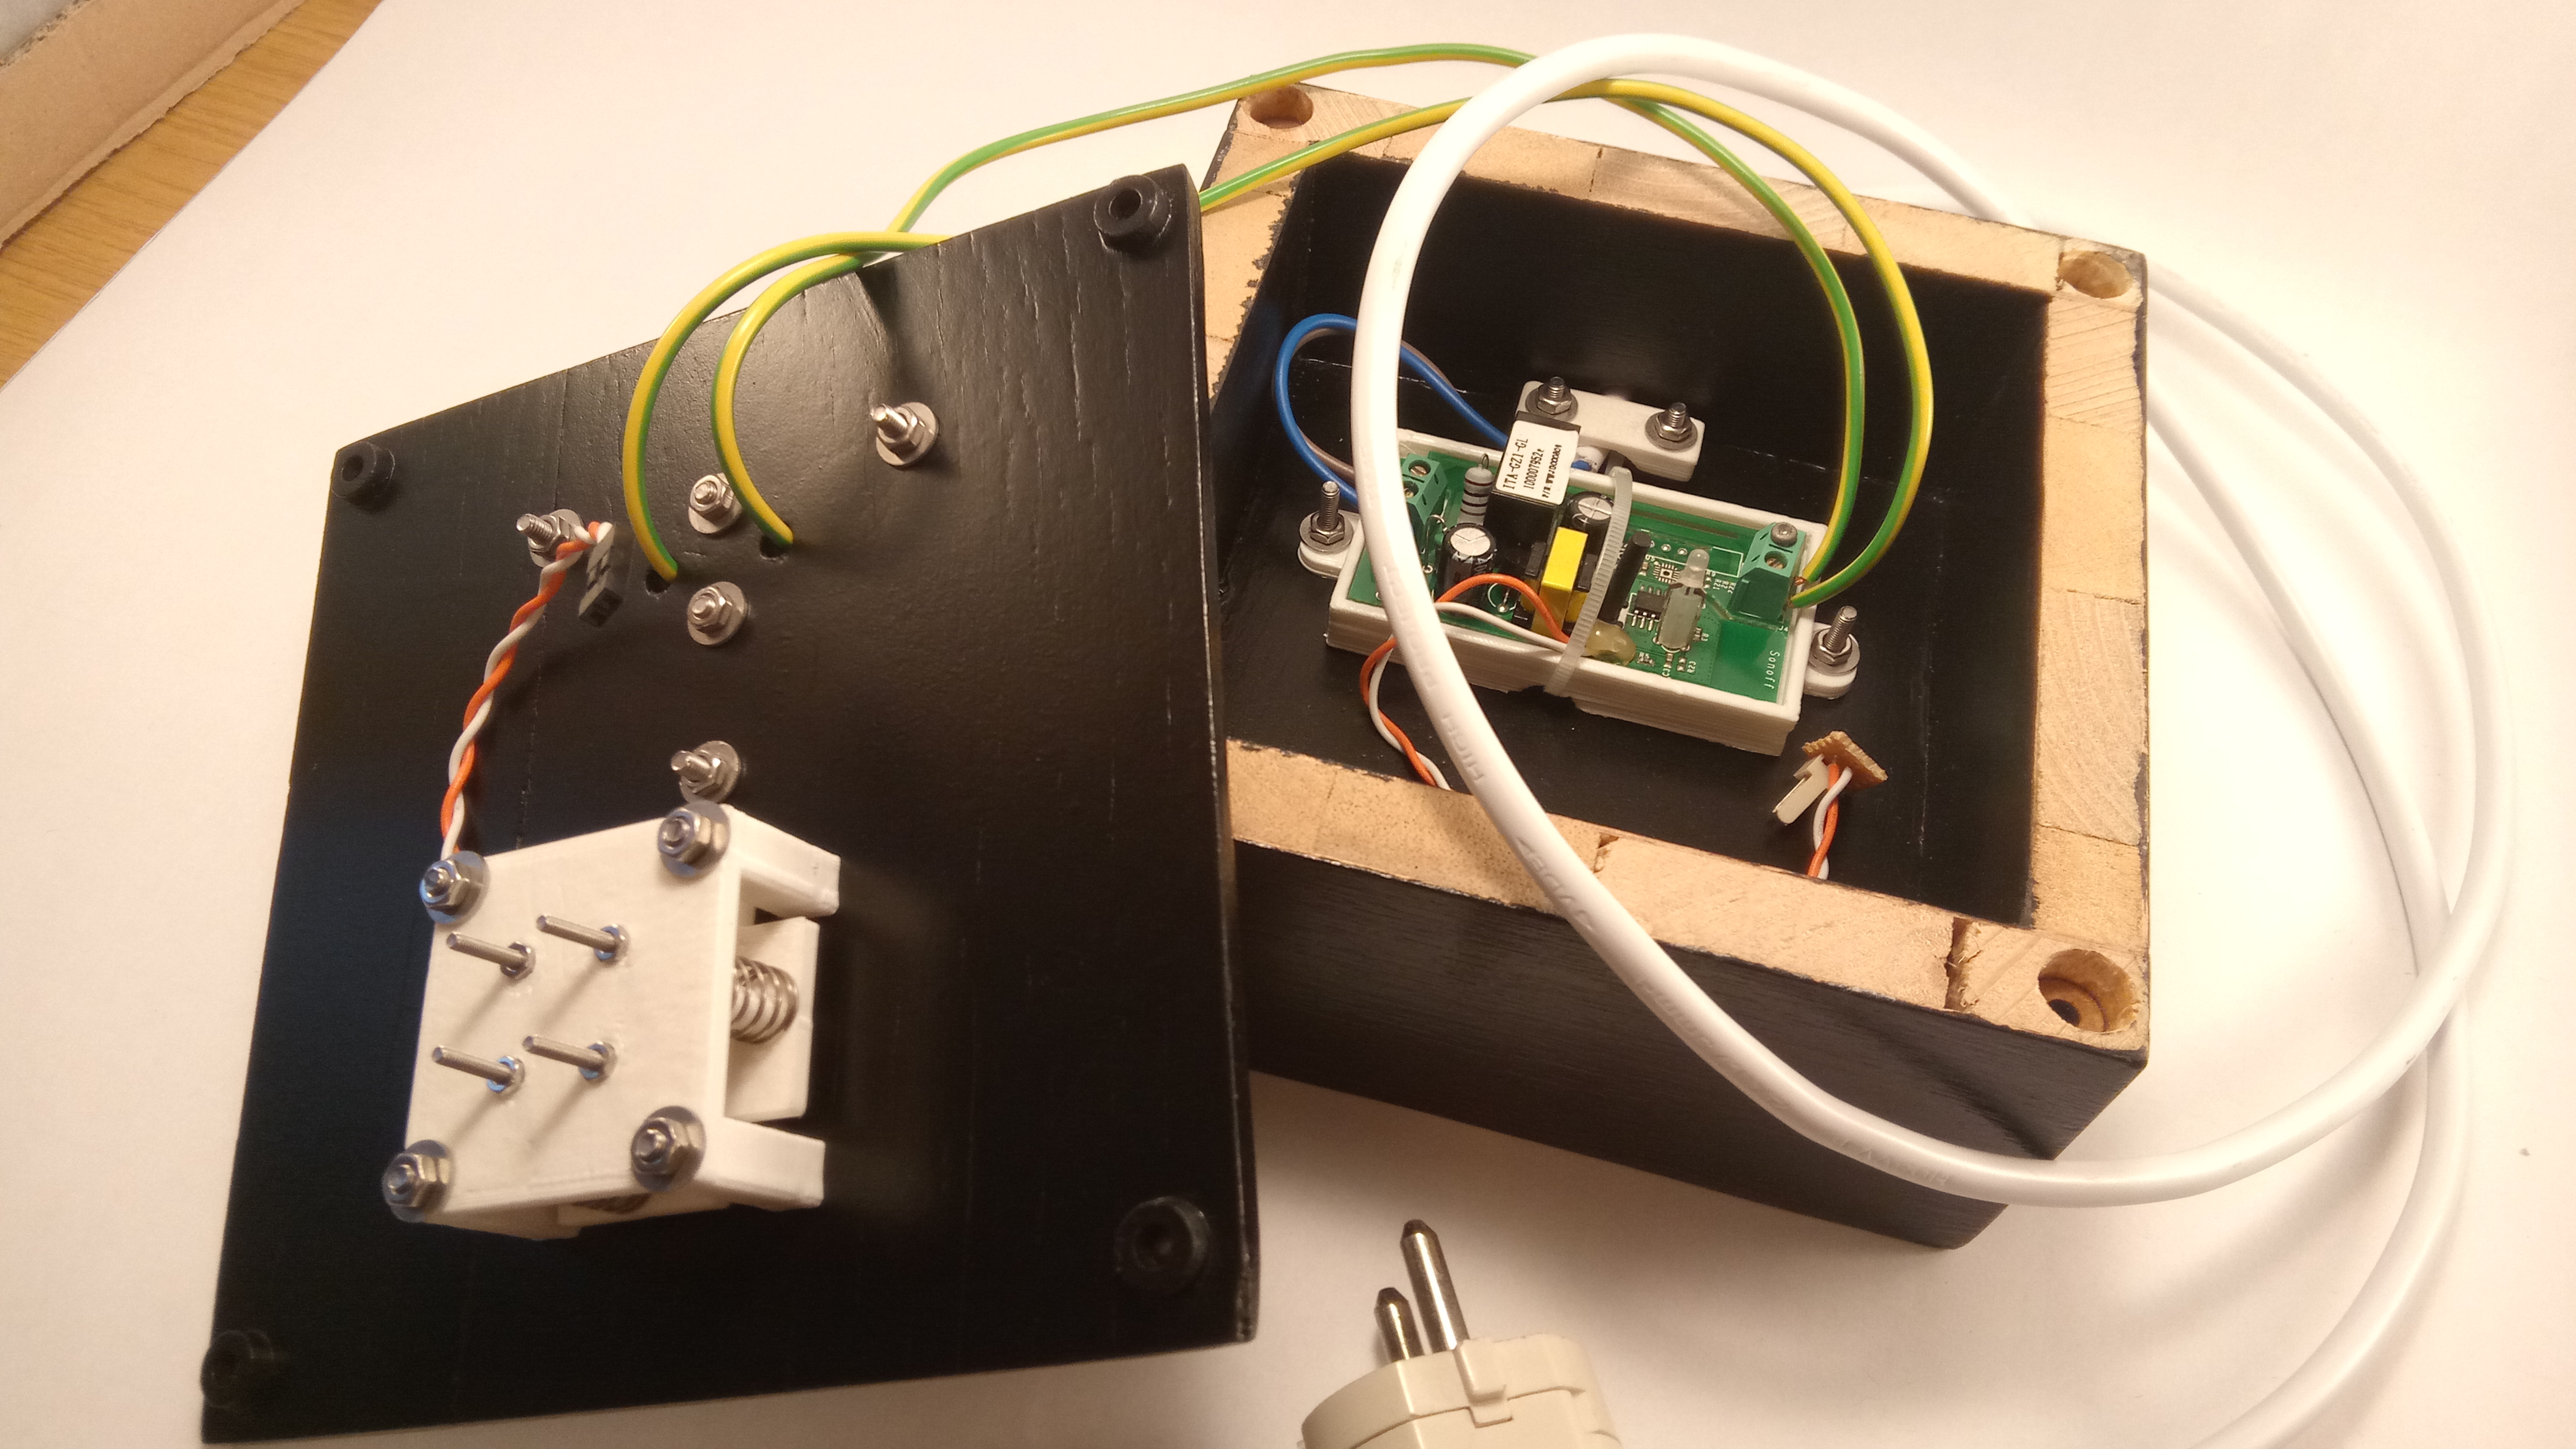
Detached lid to show the electrical wiring.

All parts of the lamp layed out next to each other. The box to the right was made with wood working tools. The remaining wooden pieces were laser cut and most of the white plastic parts were 3D printed from PLA.

Close up of the 3D printed mechanical switch. A small toggle switch was soldered on a card board and the white 3D printed parts mount around it to provide a mechanism to toggle the switch easily. The small toggle switch is connected in parallel to the existing surface-mounted switch of the Sonoff Basic. The springs provide decent feedback while pressing the switch.
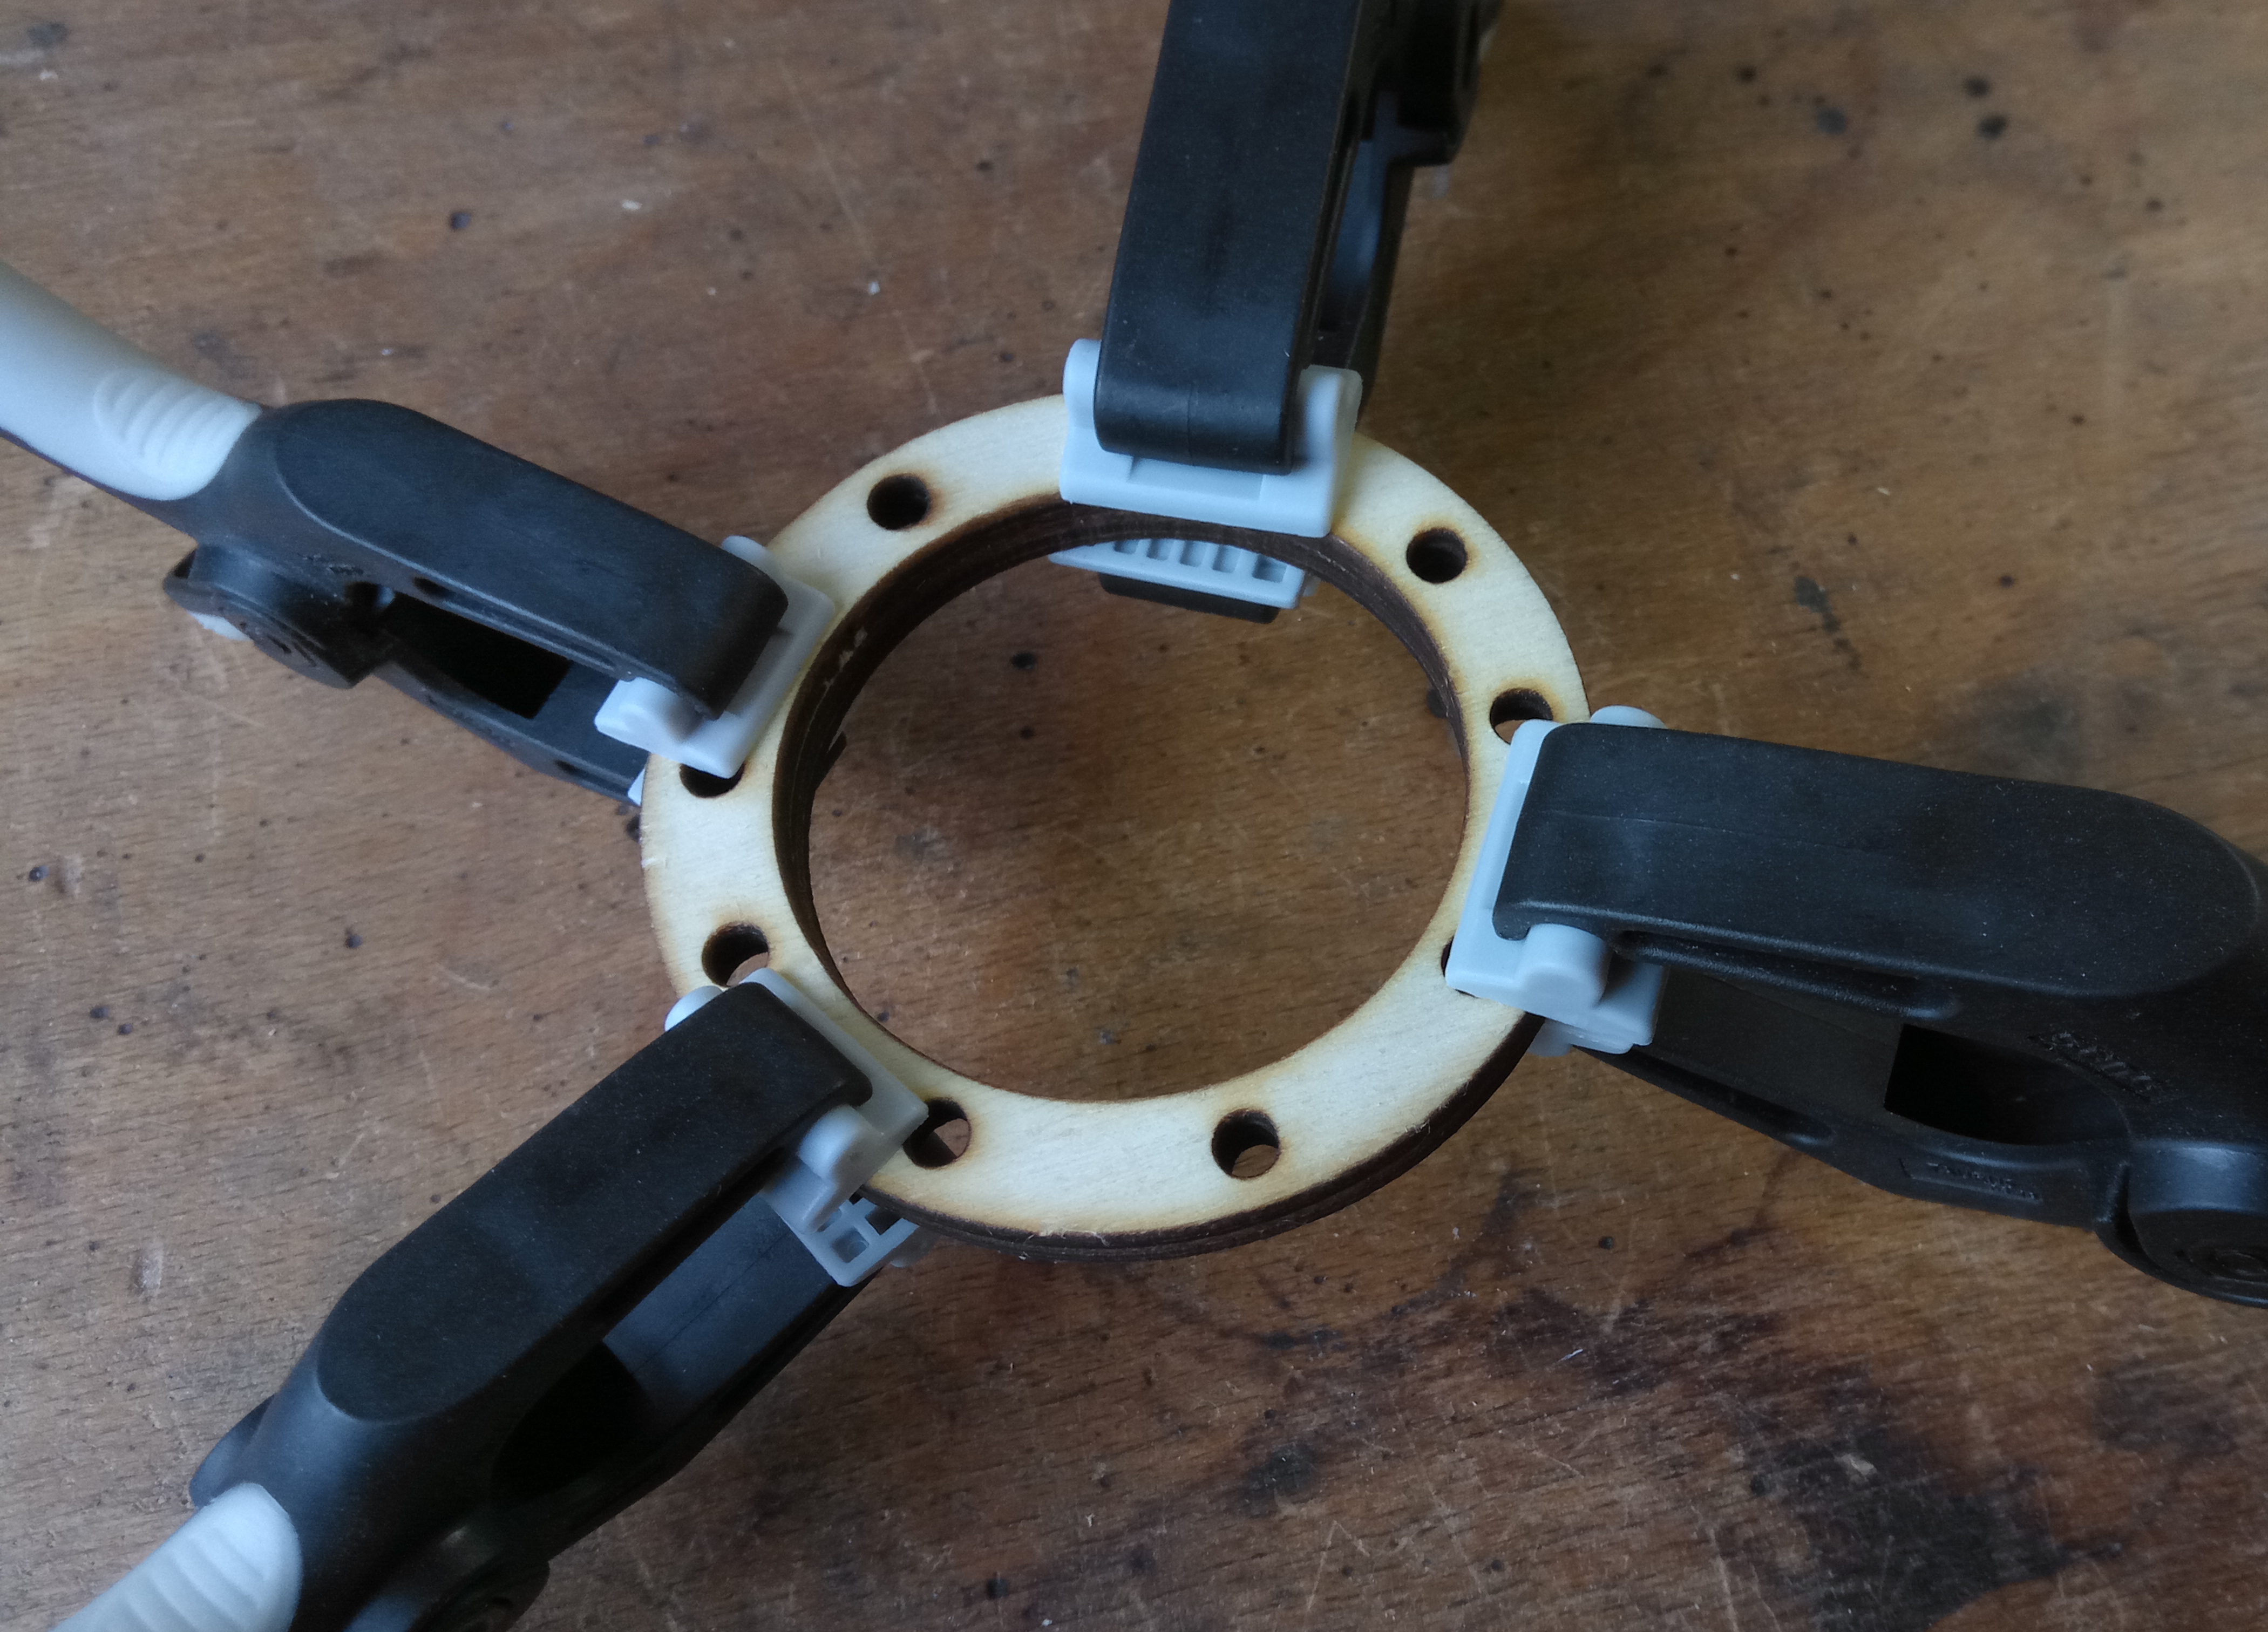
This laser cut circle is mounted around the bulb housing with metal screws. The remaining six holes provide an interface to attach different lamp shades to the lamp in the future.

The wooden base prior to painting. The bottom shows the mounting holes for the 3D printed electronics attachments. The four wider holes on the edges provide a mechanism to attach the lid.

Close-up of the mounting mechanism of the lid. The wide holes house laser cut wooden pieces with a concentrically aligned M3 nut that has been glued inside these wooden pieces. This way, the lid can be screwed in place, as shown in the second picture.

The electronics mounted to the 3D printed pieces, which, themselves, have been screwed inside the unpainted wooden base.

The 3D printed switch is mounted to the lid and reaches into the inner volume of the lamp. The orange-white cables of the switch will be connected to the Sonoff unit. The green-yellow wires power the actual light bulb and thereby carry mains voltage.

Assembly of the lamp prior to painting.

Painting of the wooden base and the lid. The inner sides are spray-painted in black.
Finished painting of the outside. It is coloured in brown.

The final assembly of the lamp. The power plug goes into the wall and the lamp is connected to the internet via WiFi by using the Sonoff app. After that, it is remotely controllable from anywhere in the world.
Additional information of the build
The Sonoff Basic is a WiFi-enabled device that is connected in series to the actuator to control. The Sonoff unit comes at a very competitive price point of around $4 and is, if desired, easy to hack to one’s needs by flasing a custom firmware. Here, however, I decided to stick to the stock firmware for the time being. While that might change later, the firmware it comes with is sufficient for me at this time and it would be easy to change it later on.
Hence, the whole exercise of this project is to construct a housing for the Sonoff Basic and to attach a lamp to it.
I designed the lamp in CAD and incorporated parts made from solid wood, 3D printed plastic parts and laser cut wooden parts. Solid wood is used for the outer box to provide sufficient stability for the lamp. 3D printed plastic parts are used for mechanical parts and mountings of the electronics. Laser cut wooden parts are used as decoration and mechanical parts. Last but not least, the electronics is wired to mains voltage.
The CAD model is shown below in two visualisations.

Realistic CAD rendering of the 3D model that I drew prior to building the lamp.

Simpler CAD rendering of the model.
The actual construction is documented above in the preceding section by means of pictures.
Conclusion
A wooden lamp around an existing IoT component has been built here. The main features of the lamp are:
- The lamp is not only controllable through an app but there is also a physical switch to trigger it. I made that a key requirement for this lamp project as I wanted to be able to control it by hand as well. The physical switch consists of a 3D printed switch mechanism and a toggle switch.
- The lamp comes with a standard E27 thread for the light bulb. The E27 thread is very popular in Germany as it is used for ceiling lamps so that corresponding light bulbs are easy and cheap to get. I decided to use a LED light bulb for energy and cost efficiency.
- The lamp can be disassembled easily. This way it is easy to, e.g., replace the Sonoff Basic unit or to flash a custom firmware onto it. Furthermore, it is possible to ensure that the mains voltage cable wiring is correct.
- I mounted a ring with 6 holes to be able to modularly attach a lampshade later on.
The build process was good fun and I am very happy with the final outcome. It’s been in use for three weeks now and works reliably: It is a great comfort to be able to control the light from all over the world as well as to control it through the physical switch. In particular, the 3D printed mechanical switch mechanism turns out to work very well.
Last but not least, the following picture shows the lamp in its new habitat:

View of how I use the lamp in my room.