- Mon 31 August 2020
- prototyping
In this article, I am showing off my small 40W DIY-ish Chinese laser cutter. I do so primarily to give back to the open source maker community, from which I learned a lot. Thank you at this point! As hobbyist makers are constantly gauging in which technology to get in next, I provide my experiences with setting up a small hobby laser cutter based on the infamous “eBay laser cutter K40” so that you can decide if laser cutting is a topic for you. It certainly was for me!
I was introduced to laser cutting the first time back in 2017. There, I was able to use a 40W CO2 laser cutter at the amazing Edinburgh Hacklab during their “open night”. The Hacklab not only provided the machine to use but also great services such as support on how to operate it, best practices and the material to use. They trusted even non-members enough to let you use it without constant surveillance, which I enjoyed very much. Furthermore, kudos to the Fablab Karlsruhe that gave me the best spontaneous workshop tour I ever experienced in a makerspace back in summer 2018. They explained me all the details of their huge and impressive DIY laser cutter.
The article will be quite comprehensive and it will mostly deal with the technical aspects of my laser cutter, both in pictures and text. Furthermore, there is one bonus tip at the end, followed by my conclusion. Since I know that people are interested in how to make money with a laser cutter, I give a few tips and write down my experiences about it in the bonus tip.
This blog post is not intended to be a general introduction to laser cutting. There are many aspects to laser cutting, such as how the machine itself works, how to focus it, which materials it can cut, how to create designs for it and so forth. Nevertheless, let me attempt to explain what a laser cutter is with a few sentences: A laser cutter is a machine that guides a powerful laser beam to a work piece in order to cut or engrave it. The work piece is typically a flat piece such as wood, acrylic or any other surface that is to be worked on. Sometimes also curved objects are processed. While there do exist diode-based laser cutters, the laser cutter I am talking about here uses a CO2 laser tube to generate the laser beam. This type of laser cutter is referred to as CO2 laser cutter and they come at power levels of 40W or more. The laser beam is created in a stationary laser tube and then guided onto the work piece with reflective mirrors that can deal with such high powers. Lastly, the laser beam vaporises the material and thereby creates the cuts. There are big differences between the power levels of laser cutters and I am only talking about the lower end of the spectrum. Hence, after having explained to people that I own a small DIY-ish laser cutter that can cut wood, leather and some plastics with its 40W, I typically had to negate their immediate question if I could cut some metal pieces for them. For metals, you need around 10x as much power. Larger machines might even have up to 100x as much power as my machine, meaning they offer a few kilo watts of laser output power.
After having been attached to 3D printing for around 3 years at the time of 2017 when I was introduced to laser cutting, I was used to production cycles of multiple hours to finish a single 3D printed part. I always found that this is quite a long time for the impatient hobby-ist. Suddenly, there was a method to produce parts from flat surfaces in only minutes. I was amazed and knew that I needed access to such a machine in the future as to get deeper into rapid prototyping and small batch manufacturing with it. Since in Marburg there was no such machine anywhere close, I decided to build my own laser cutter at the end of 2018.
I based my small hobby laser off a Chinese laser cutter, commonly referred to as K40 laser cutter. Finally, my laser cutter setup is shown in Fig. 1 with my laser cutter itself and some of the additional major modifications. The modifications will be explained later in this article with texts and pictures. This part makes up most of the article. The table of contents is given at the end of this section to make it easier for you to navigate.

Figure 1: My laser cutter setup. Some of my modifications are annotated with text. These modifications are explained later in this article.
The stock K40 laser cutter
The K40 laser cutter is a small hobby grade CO2 laser cutter made in China. At a price point of about $300 to $400, it comes with everything that is needed. This price is very cheap as comparable products such as the Mr. Beam II or the Glowforge series start at around $3000! Hence, it has been widely adapted in the maker community and there are many add-ons, hacks and reviews about it out there.
At the end of the day, it is a fully functional 40W CO2 laser cutter with lots of accessories like pumps, extraction fans and software. However, since there is also no free lunch in the realm of power tools, the low price point comes at a cost. First and foremost, don’t expect that the laser cutter works properly or at all upon arrival. All kinds of difficulties have been reported, such as misaligned laser beams, broken laser tubes or dirt spread all over the machine. Also, there are more disadvantages of the machine:
- The control board is rather limited.
- The K40 was initially made to etch rubber stamps and therefore comes with a very clumsy metal bracket to hold the material in place. It does not allow for adjustment in the height direction and limits the work area heavily.
- The 40W laser tube only reaches around 32W power output on average.
- The software is bad.
- The extraction fan is bad.
- The machine does not have an interlock system. Hence, it does not disable the laser beam when you open the lid.
- The frame of the machine is not grounded. Your life is seriously in danger at this point because the machine uses mains voltage and a high voltage line of 20kV to generate the laser beam.
I bought my laser off eBay from a local reseller located in Germany. This helps to avoid any difficulties with import regulations compared to buying directly from China. Interesting enough, I did not even pay more than what I would have paid when ordered from China directly. Figure 2 shows a representative offer of the K40 laser cutter.

Figure 2: Screenshot of a typical eBay listing of the K40 laser cutter.
My modifications to my K40 laser cutter
Chinese laser cutters at this price point need to be seen as a base to start from. You can build a very well working laser cutter system by investing some (little) money and (more than little) time into it.
I have done a large number of modifications to my stock K40 laser cutter. I will go over all of these modifications in the following and explain them.
Laser bed
I replaced the mechanism to mount work pieces with a custom made laser bed from aluminium profiles. It features replaceable inlays that fit A4-sized wooden sheets and allows for around 4cm of z travel up and down. This travel is necessary to properly focus the laser beam onto the work piece. The z travel is realised by threaded rods. The bed is assembled with 3D printed parts. The knobs to adjust the z height are laser cut. The laser bed is mounted to the laser cutter frame with metal screws.

Figure 3: Custom laser bed. (a) Laser bed with inlay inserted. (b) Laser bed without inlay to see the frame structure that is mounted to the machine frame. (c) Close-up of the inlay. The dirt comes from many hours of operation. (d) Connector piece for inlay assembly. (e) Mechanism to adjust the z height.
Drag chain
I bought a drag chain to reduce the chance of burning freely dangling cables inside the laser cutter. It is installed with a small 3D printed mount for the laser head and one from wood for the frame.

Figure 4: The drag chain as indicated by the arrow. Electrical wires can be guided through it to reach the laser head. The drag chain is mounted to the frame of the machine and to the custom laser head.
Air assist
An air assist is a mechanism that pushes air onto the spot where the laser beam hits the work piece. It kills flames, adds oxygen to the cutting operation and typically also guides the fumes to be extracted out of the laser cutter. Normally, an air assist is realised by a compressor and a tube that guides the air to the work piece. Instead, I use a radial fan mounted to the laser head to serve the same purpose. This solution is powerful enough and comes with the benefit of being very silent. The mounting for the radial fan is 3D printed and guides the air right onto the spot where the laser hits the work piece. The electrical wire to drive the fan is routed to through the drag chain.

Figure 5: Air assist. (a) Radial fan mounted to the laser head to serve as air assist. The attached tape makes the assembly air-tight. (b) View from below to show the nozzle where the air is released onto the work piece.
Mirror head
In the process of aligning the laser beam with the mirrors, I had to realise that the fixed-angle laser head that comes with the laser cutter is not sufficient for my purposes. This was because the linear motion system was not mounted properly into the frame, I believe. Luckily, the solution was easy: I needed a fully adjustable mirror in the laser head. For that, I turned towards CAD to model a fully featured laser head. The result is a laser head from 3D printed pieces, springs and metal screws. The assembly turned out to work beautifully and I used it ever since.

Figure 6: Fully adjustable laser head. (a) Overview of the laser head that includes the adjustable mirror, the air assist mounting and the drag chain mounting. (b) Close-up of the adjustable mirror. It follows the general rule of pre-tensioning the mirror mount with springs and three screws to fine tune the position against the pre-tensioning. (c) Top view of the mirror head. The three tensioning springs and three adjustment screws can be seen.
First mirror mount
During the alignment process of the laser beam it turned out that the maximal travel distance of the first mirror was not sufficiently large to properly align the laser beam. Hence, I replaced it with a fully adjustable mirror mount platform to allow for proper beam alignment.

Figure 7: Fully adjustable mirror platform indicated by the arrow. It is a piece of steel that is cut to size and has holes for the mirror mount as well as the adjustment knobs. The adjustment is achieved by two nuts that are screwed against the steel plate, one from the top and one from the bottom, in order to set the height of the plate. The lower nut is turned by a 3D printed knob that is shown in white. There are three of these height adjustment mechanisms. Also, the mirror bracket can be shifted backwards and forwards. After these rough adjustments, the mirror can be fine tuned with the adjustment knobs of the mirror mount itself. The path of the laser beam is shown by a dashed red line and points into the work area of the laser cutter.
Adjustable laser tube mounts
During the alignment process it turned out that the fixed laser tube mounts in the back of the machine where problematic as I couldn’t adjust the position of the laser tube. Hence, I built my own fully adjustable laser tube mounts from 3D prints, metal screws and aluminium profiles.

Figure 8: Fully adjustable laser tube mount. A C bracket from aluminium profiles is the main structure of the mount. It is installed into the laser cutter with metal screws. A 3D printed plastic piece attaches to the laser tube using zip ties and mounts to the C bracket. Two slots in the C bracket together with screws as linear motion system provide the possibility to adjust the position of the tube. The positions are adjusted with 3D printed knobs. The inset shows how the laser tube is mounted inside the laser cutter using two of my fully adjustable laser tube mounts.
LEDs
It is essential to see what the laser cutter does while in operation. Opening the lid while the laser is in operation is a bad idea because the machine does not come with an interlock system and happily continues its job when you open the lid. Since the lid of the laser cutter has an built-in window, adding LEDs was the best approach to make the inner operations visible.

Figure 9: LED strip glued inside the machine to the front. The LED strip is connected with a detachable connector. The inset shows this connection in greater detail.
Control panel
I left the control panel of the laser cutter mostly untouched. Make sure to get the K40 version with the analogue ampere meter as it is more reliable than the digital versions that come with some of the K40 variations. An accurate current measurement is crucial because if the current is too high, the laser tube is damaged and you need to replace it. This can be quite a pain as the tube is one of the most expensive components of a laser cutter.

Figure 10: The control panel of the laser cutter. From top to bottom, the arrows indicate the analogue ampere meter, the current dial and the laser test switch. I attached a gauge to the current dial to get the power levels right and had to replace the laser test switch as the original broke.
Electronics panel
I introduced an electronics panel to add a few convenience features to the laser cutter and its operation. These features include LED lights to illuminate the work area as well as an air assist. The electronics panel allows to switch all of these features easily.

Figure 11: Electronics panel. (a) Front view. The third switch is currently not used and provides room for future upgrades. (b) The inner wiring of the electronics panel. It distributes 12V to the switches.
Water cooling
While the laser tube produces around 30 to 40W of output power, it produces around 10x as much heat in that process. If the laser tube is not cooled, it gets too warm and is destroyed. Hence, water cooling is necessary. The machine came with a small aquarium pump which worked flawlessly in my case. I added a bucket of distilled water with a chemical to reduce algae growth in a low concentration. Also, I added a thermometer to monitor the water temperature. The bucket has a custom lid with holes for the water tubes that reach to the laser. Also, the lid enables me to easily insert a bottle with frozen water in it in case the cooling water gets too warm. This is typically the case in summer. Using this strategy, I am able to operate the machine below a cooling water temperature of 20 degree Celsius.

Figure 12: Water cooling. (a) Water cooling solution as realised by a bucket of distilled water. (b) Close-up of the setup to show how the custom lid allows the insertion of a bottle of frozen water, the thermometer and the water tubes to the laser cutter. The wooden piece that is attached to the plastic lid provides extra stability for the custom lid.
Air exhaust system
The laser cutter evaporates material to perform the cutting. The fumes that stem from this process, while not being toxic when using the correct materials, smell very bad and need to be extracted from within the laser cutter out into the free. The air exhaust fan that comes with the laser cutter and its mechanism to mount it to the machine are pretty bad and should be replaced. I did so by building a custom air exhaust fan from an old 300W motor I had laying around. The power is reduced to around 200W with a power resistor that is mounted inside the wooden fan box to get sufficient cooling for the resistor. The 200W system is absolutely sufficient and still much stronger than the 25W stock air exhaust fan. Also, I made a custom attachment for the air extraction hose to the back of the machine from wood. The laser cutter is placed close to a window so that the extracted air is blown out of the workshop.

Figure 13: Air exhaust system. The two insets from left to right show the custom air exhaust fan and the custom attachment for the air extraction hose to the laser, respectively. The blue hose came with the machine and is quite stiff. I bought the white one to connect the fan to the attachment on the laser cutter. The air exhaust fan features a custom laser cut control box that is visible in the left of the left inset. The fan is sealed with black tape. The hose connection pieces for both, the fan and the box, are 3D printed pieces but they are not visible here.
Monitor mount
A laser cutter is typically controlled from a PC. After around 2 weeks I had enough of flimsy laptop setups next to the machine and installed a workshop PC with a proper monitor mount. The mount allows for easy rotations with two degrees of freedom. It is a super simple design made from wood but very sturdy and incredibly useful in the daily operation of the machine. The monitor mount is attached to a shelf that is located next to the laser cutter. The attached monitor connects to the workshop PC. This modification is one of the most useful ones.

Figure 14: Unfolded monitor mount, showing the wooden construction. The monitor is mounted with its VESA connections and can be folded in when not in operation, see the inset. The blue arrow marks the WiFi USB adapter of the workshop PC to connect it to the internet.
Rolling cart
The laser cutter stands on a rolling cart. This rolling cart used to be a simple shelf that I put on wheels with a strong metal frame. Also, I added a solid top work plate to it to place the laser cutter on. The rolls allow me to move the machine easily. The drawers store all the tools and accessories that I need to operate the laser cutter.

Figure 15: The rolling cart. (a) Overview with all drawers closed. (b) to (e) show each of the drawers with the different accessories I use. Most frequently, I use the keyboard and mouse in the top drawer shown in (b) to operate the workshop PC. The drawer shown in (c) holds all the tools. The drawers (d) and (e) accommodate some of the wood that I laser cut as well as past projects.
Self made tools
During the installation and calibration process of the laser cutter, I made a few tools that made my life easier. The more interesting ones are shown in Fig. 16.

Figure 16: Self made tools. (a) Laser beam alignment helper. In order to align the laser beam, one needs to check if it hits the centers of the mirrors. In order to judge if it does, I developed a small 3D printed magnetic stand that accepts pieces of paper and that can be mounted right in front of the mirrors. The laser beam burns the piece of paper that is installed in the alignment helper so that one can see where the infrared (and therefore invisible) laser beam hit the mirror. Once the piece of paper is burned too much, it can be replaced easily. (b) Laser beam alignment helper for vertical direction when the laser beam hits the work piece. With this tool, I can ensure that the laser beam hits the work piece in a 90 degree angle. Again, a piece of paper can be attached to it. To properly align the vertical beam direction, the piece of paper can be moved up and down guided by the two short screws. (c) Laser tube rack. When doing work on the laser tube, I hook these holders in the back of the laser cutter and place the tube onto them temporarily. With that, I don’t need to disconnect the tube from its electrical wires and the water cooling tubes. (d) Nut screwing helper. When working with metal screws in hard-to-reach places, I can place the nut at the end of this helper. It holds the nut in place, avoids any spinning of the nut and is thinner than my fingers so that I can reach places I could not otherwise.
Wood pressing machines
My favourite plywood tends to warp. Hence, I place the wood, that is to be used with the laser cutter, in a machine that makes sure the wood does not warp over time.

Figure 17: Versions 1 and 2 of the wood pressing machine. (a) The first version used threaded rods to fix the wood between two thick wooden pieces. As it was quite cumbersome to use this version, it has been retired and replaced by a second version. (b) The second version is just a piece of wood and a very heavy anvil that compresses the pile of wooden pieces beneath it. It works great.
Software
The stock software that comes with the laser cutter neither worked well nor did it run on Linux. However, there is a beautiful open source implementation of a control software: K40 whisperer, which works well and runs on Linux.
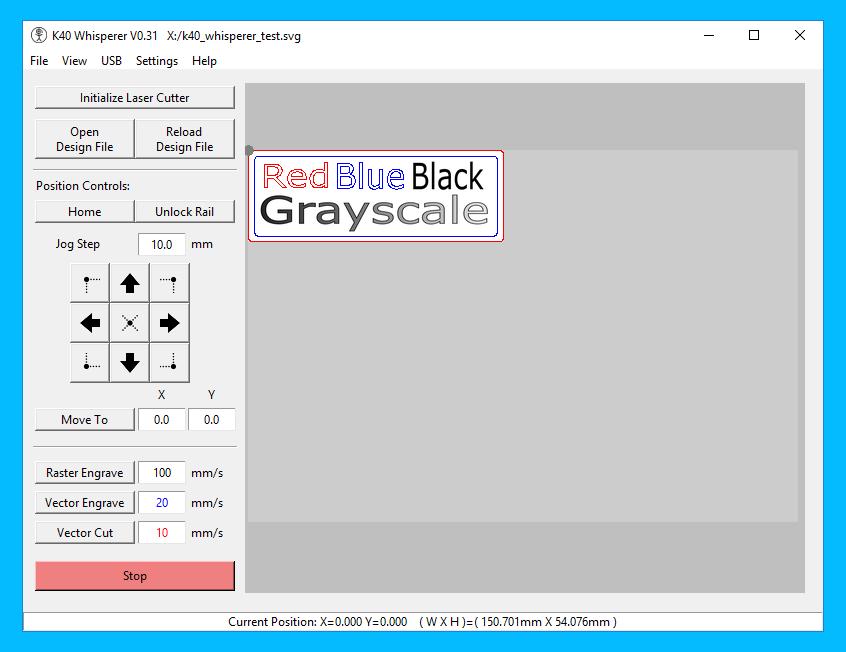
Figure 18: Screenshot of K40 whisperer. Picture taken from the K40 whisperer website.
Bonus tip: Making money with a laser cutter
In this bonus tip, I would like to write down some notes on how to make money with a laser cutter. Based on my experiences, making money with a laser cutter is possible. In particular on a small hobby-ist laser cutter as such a machine is very affordable. This makes it easy to begin your, for example, side business.
Let me state my thoughts on that topic in the following unsorted list:
- Get in contact with local entrepreneurs. Maybe they have a regular meeting that you could attend. Typically, these communities are often very interested and very supportive. In Marburg, there is for example GruenderVirus. At the very least, attending events of these communities is business networking. This is a very valuable activity.
- Look for business or idea competitions to participate in. They might be a good place to get some attention. Generally, make sure that people know what you do. You want to be known as “that laser cutter guy”.
- Be generous with give-aways. Small give-aways literally cost you nothing but are a great way to promote your laser cutter business.
- Similar to the previous point: Have prototypes and small things ready to show off! You, as a tech affine maker, might not believe it but people sometimes cannot understand the broad spectrum of objects a laser cutter can produce. Having small demonstration items ready helps a lot for your future customers to understand what kind of things you can fabricate. Aside from different designs, I also recommend different materials and different finishes. Take, for example, wood stain, which can change the look of regular wood completely.
- Think of presentation channels. Maybe a website? Maybe some kind of social media like Instagram? Once you established a channel, prepare loads of content for it to keep your audience busy. Oh, and don’t forget to track your audience for analysing the performance of your channels. The channel that I used was a minimalist website: http://lellep.xyz/laser.
- Value your work time. Do not work for free but always take into account the time you will spend on a project in your pricing. Especially when you begin it is very tempting to remove your personal cost from the equation in order to decrease your price. Please take my words of warning: Not valuing your own working time might back fire at some point.
- Do not work with everybody. If you don’t like your potential business partner - say, a person who wants to order something from you - then just don’t work with that person. Getting a job done for somebody involves a quite tight relationship for a short amount of time and if you see potential problems arising due to differences in personalities, then just don’t do it. Assuming you pursue your ambition of making money with a laser cutter seriously, please take my word when I say that other, much more pleasant, business relation will come for sure.
- Get a business license. Only with that, you are on the safe side regarding taxes. Also, it enables you to offer your service more professionally. Not being registered means that you cannot scale your business beyond a certain point.
- Have a goal. For instance, a good goal might be to earn the money back that you invested into the laser cutter machine itself. Given my very positive experience with Chinese laser cutters, I would always argue to get a decent Chinese machine. With that, the initial investment should be around $300 to $4000, which is an ideal intermediate financial goal to reach. After passing this number, you could deliberately stop your ambitions if you find that you don’t like laser cutting as a business as much as you thought.
- Potentially: Find a niche. Start-up people always say that you have to find a niche: For example, the first people to write a blog on travel adventures made a fortune with it. I am not totally convinced of that statement when it comes to laser cutting. That is because a laser cutter is a very versatile machine that can deliver a multitude of products. Anyways, …
- … invest at least a little bit of thought upfront in the objects that you want to sell. Is it ear rings, merchandise, is it B2B or B2C? None of these decisions need to be final but you will see that there is just not enough time to serve all possible business directions. Having a rough plan, or better a rough analysis of the market opportunities, helps a lot in staying focused later on.
- Establish a workflow to reduce the time you need for finishing a job. Think of how to organise your laser cutter design files, how to organise your business contacts and set up your laser cutter in a way that makes it easy to work with. For example, I found that a well designed Excel spreadsheet is useful for documenting my work and coming up with a price. Also, I used a cloud service to transfer the design data to my workshop PC as to reduce the time it takes to finish a project. Lastly, getting the right tools is necessary for an optimised workflow. For example, for assembling laser cut objects, I found the following tools to be useful: Rubber bands, masking tape, (wood) glue, precision tools (to remove excess glue, for example), clamps and something heavy to compress wet glue.
- Build your machine thoroughly. Once you get laser cutter jobs, you do not want to disappoint your customers because your laser cutter broke after just a few hours of work time. Rather invest a few more hours to build the machine properly. You will benefit from it in the long run.
That’s all.
Setting up a Chinese laser cutter for commercial interests is a great way to bootstrap a business, I believe. So go out and do it!
Conclusions
I learned a lot working on this project! First, I learned technical aspects on how a laser cutter works, how to operate it and how to make designs for it. In particular, fixing the Chinese stock K40 laser cutter to become a fully functional machine was good fun! For example, I learned how to make complex CAD designs with it such as the adjustable mirror head, air assist and laser bed. Second, I learned many business aspects that might become useful at some point.
Now, would I do it all again? Yes, I would!
However, now that I know how to fix and customise a Chinese laser cutter, I would probably get a larger machine. The price levels typically go as $400, $800, $1300, $2000. I would probably aim for a $2000 machine since I know that getting the money back through laser cutting jobs is realistic. The most interesting aspect of a more expensive laser cutter is the larger work area. The reason that this is so interesting is what people call scaling: A larger machine can produce designs with less manual intervention. Hence, you can produce more in a given time, which makes you much more competitive in the market.
If you do not have any commercial interest in laser cutting, I fully recommend the K40 laser cutter. If you do but you’re not sure, yet, then still get the K40 machine as you can upgrade later if necessary. Only get a larger machine if you really know that you are seriously interested in getting in the business of laser cutting.
Feel free to reach out to me if you have any more questions regarding laser cutting. I am happy to help makers with some advice to get their laser cutter!